
This guide will walk you through the process of setting up an email address in Outlook 2016.
When you first open Outlook 2016 you should be presented with the "Welcome Screen" which should help guide you through the process of setting up your email address.
Step One
Let’s start the setup by clicking "Next".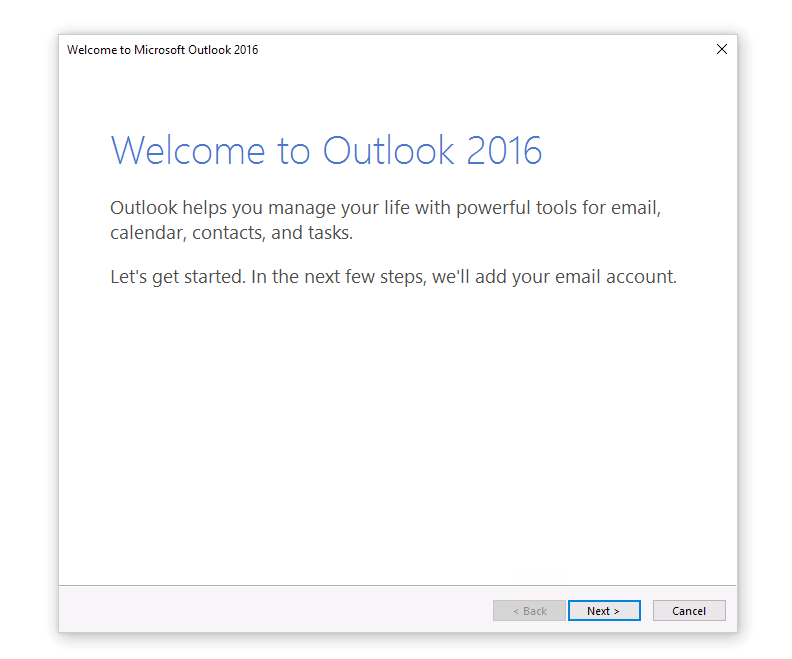
Step Two
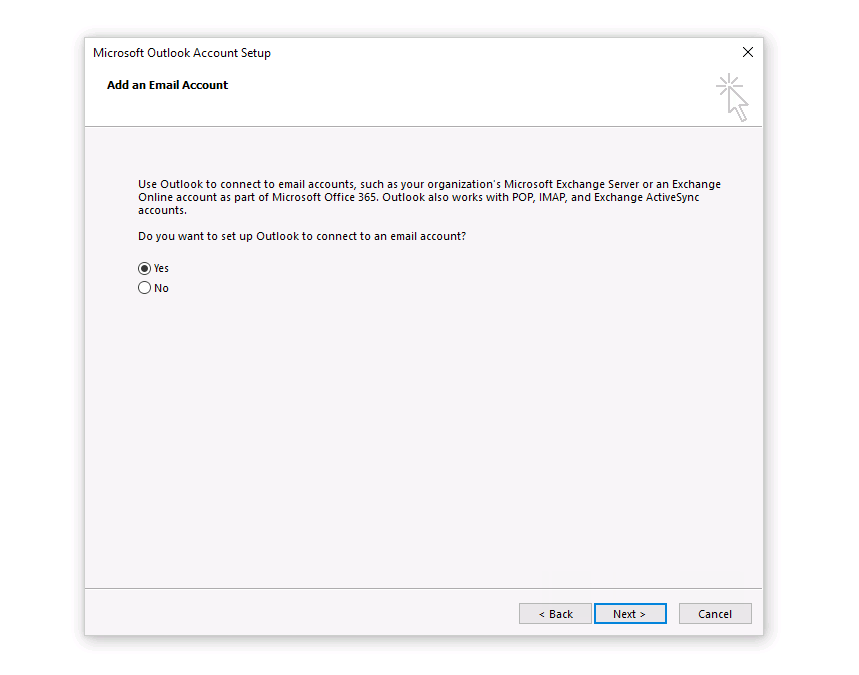
On this next screen (Add an Email Account) we want to select "Yes" then click "Next" to continue.
Step Three
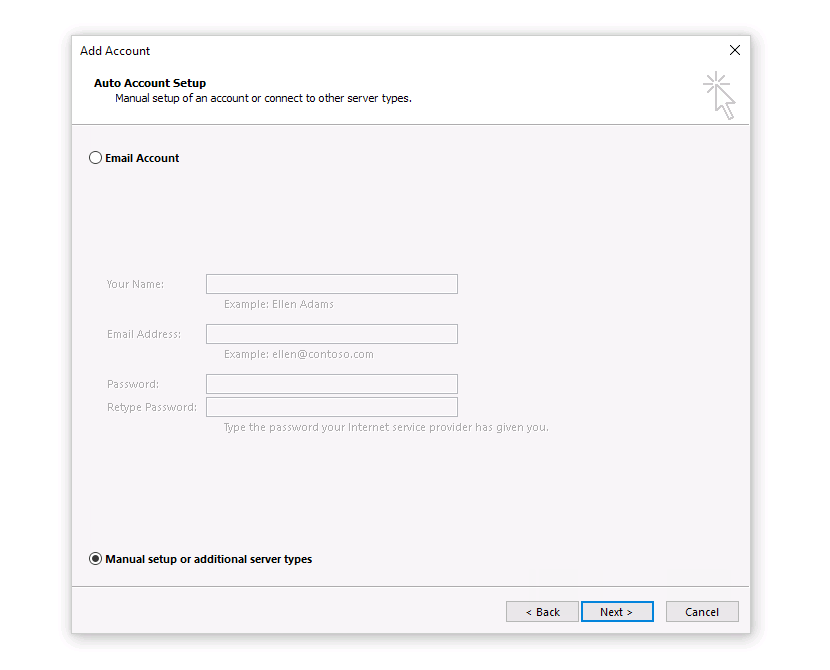
We now need to select "Manual setup or additional server types". Then click "Next" to continue.
Step Four
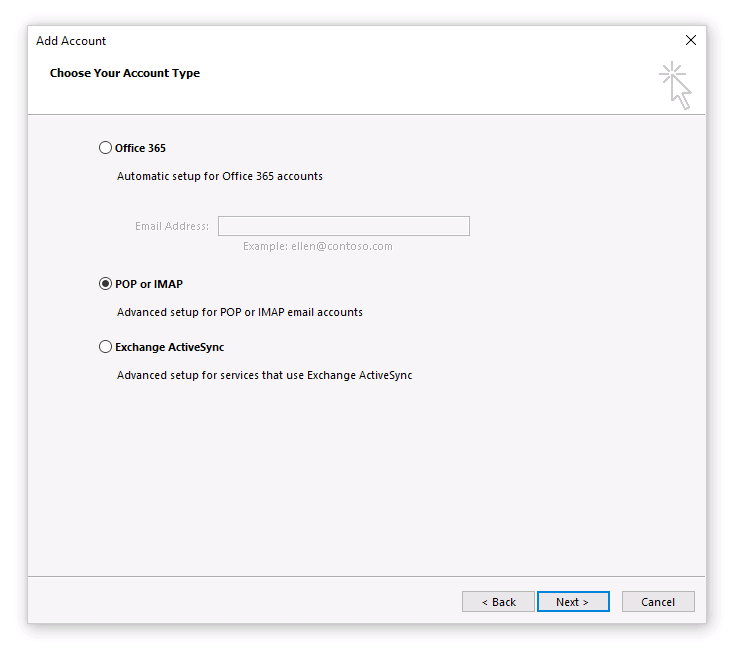
From the next screen "Choose Your Account Type" select "POP or IMAP". Then click "Next" to continue.
Step Five
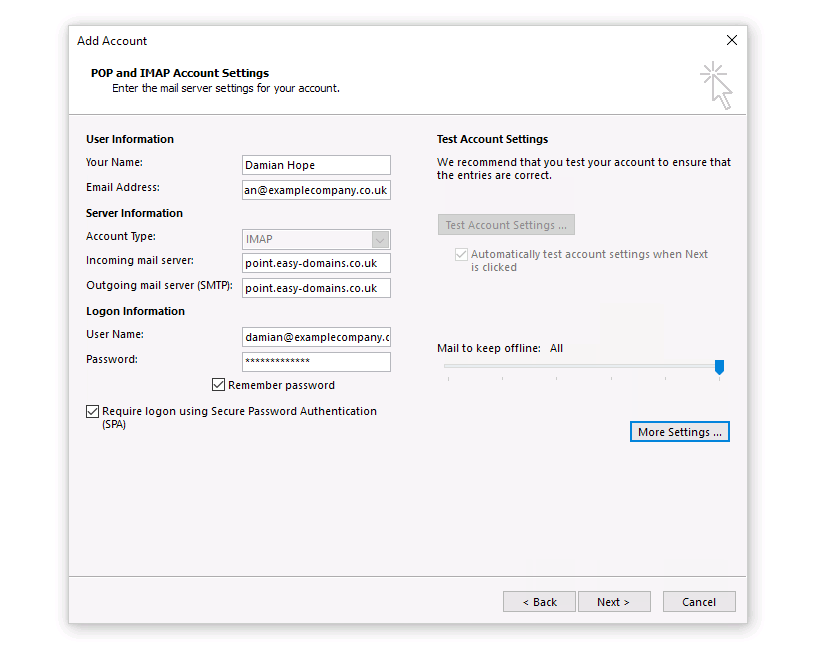
From this next screen, you need to enter the server settings for your email account. If you are not sure what the mail settings are or where to find this information please check out our "How to Create an Email Address in Easy Sites". The information required is listed under Help next to the email address you are setting up.
Once you have found the server settings, enter the information in the relevant fields. Please see the settings below as an example.
Step Six
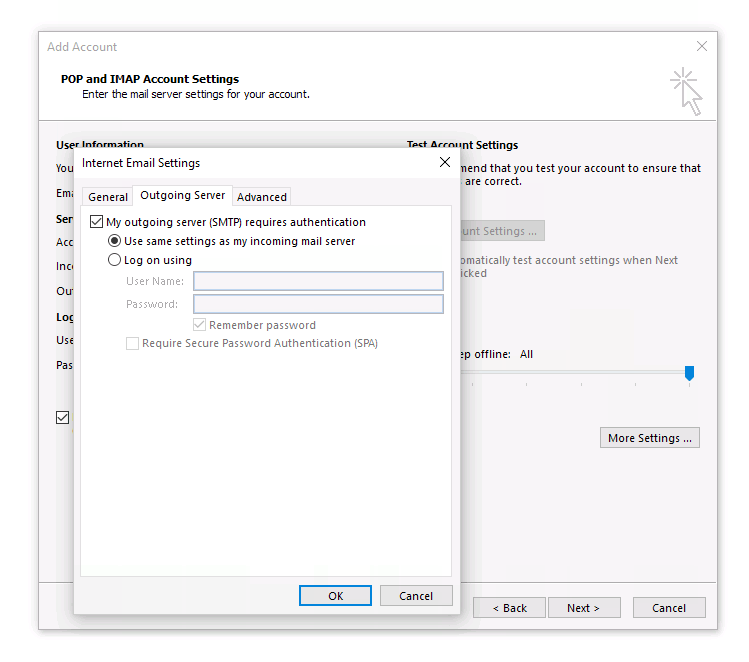
Once everything has been added, we need to click "More Settings". Then from the new pop up, we need to go to the "Outgoing Server" tab and tick "My outgoing server (SMTP) requires authentication" as per the screenshot below.
Step Seven
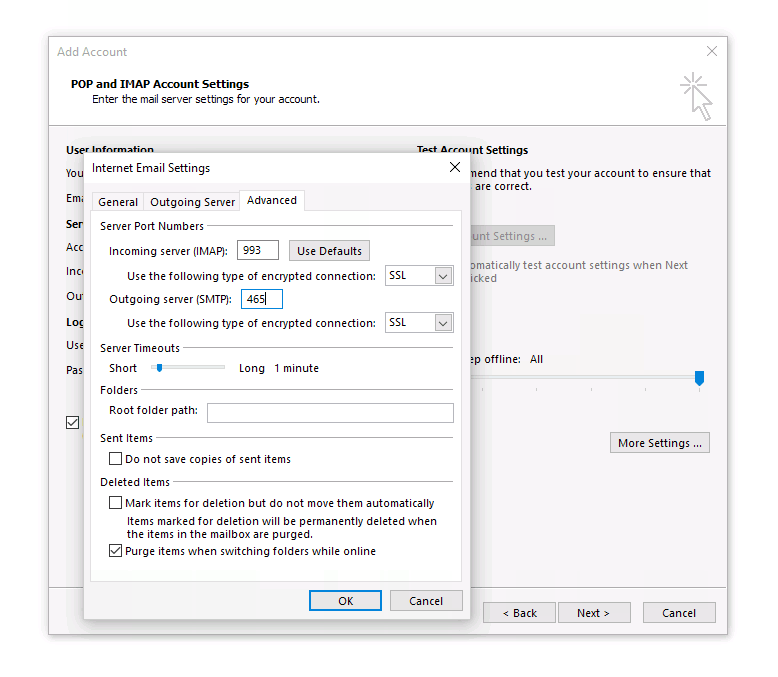
We now have just a couple more settings to change in this popup. Please change to the "Advanced Tab" and change the incoming and outgoing connection type to "SSL" and change the "Outgoing server (SMTP)" to port 465.
You will also find a few more advanced options here, such as not saving copies of your sent emails and marking items for deletion (but not automatically moving them). These options are unchecked by default.
Once this has been changed click "Ok" to save the changes.
Step Eight
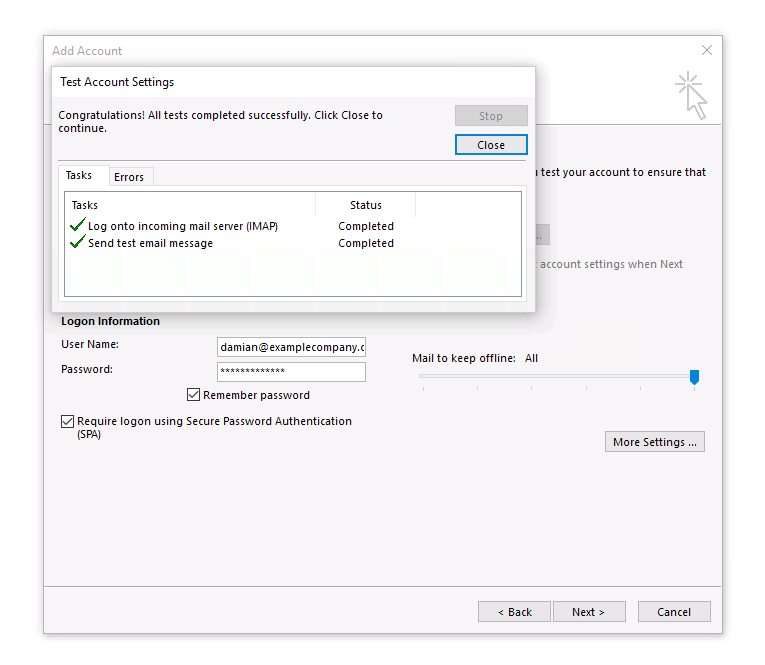
Now we are back on the main popup wizard, we can click "Next" to continue. Outlook will now run a quick check to make sure everything entered was correct.
Step Nine
If everything tested successful click "Close" to complete the setup. Your emails are now setup. Outlook will start synchronising all your Emails. Click "New Email" to get started.
If you have any problems following this guide, please contact our team at support@easy-domains.co.uk or call us on 01253 968004.
Comments
0 comments
Please sign in to leave a comment.