
In this guide we will walk you through how to set up your emails in the default Android Mail app. This is applicable any Android devices including mobile phones and tablets which run the Android OS.
The following set up guide is based on using a Huawei P20, running Android OS Ver 9 and EMIU 9.0.0; please note that Android OS interfaces can be slightly different, and this tutorial will apply to most Android devices, including Samsung and Sony devices.
Before you start, you will need the following information:
- Your email address and password
- Your incoming and outgoing mail server settings
If we have created the email address for you, a member of our team will have forwarded these details to you by email.
If you haven't created an email address yet, please follow our tutorial on How to Create an Email Address in Easy Sites.
Let's get started!
1. Please navigate to the "Add Account" screen; you can use the following paths:
- Settings > Users > Accounts > Add Account > Email
- Mail > Settings > Add Account
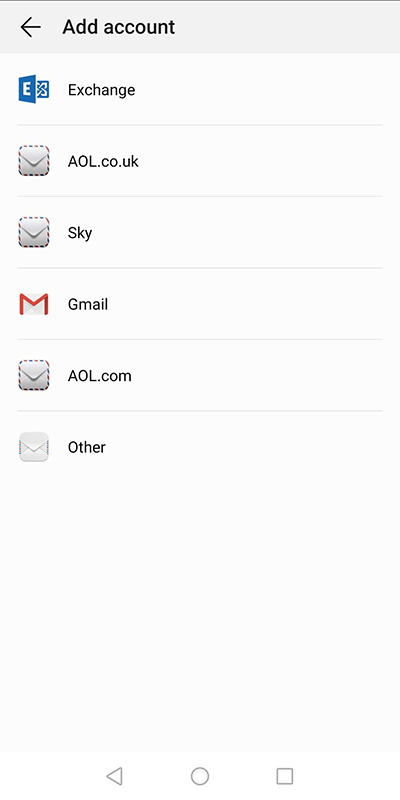
2. From the list of email providers, please select "Other"
3. Enter your email address and password.
After filling in both fields, select "Manual Setup", followed by "IMAP"; you will now need to enter the incoming and outgoing mail servers. Your incoming and outgoing server information can be found in the "Help" section of the email address you are setting up or if we created the email address you can refer to the details we will have forwarded to you.
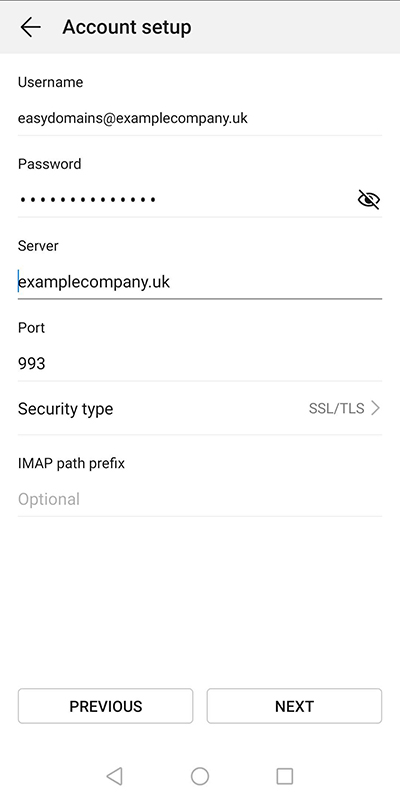
4. After you have updated the incoming mail server, click “Next” to update the outgoing mail server settings.
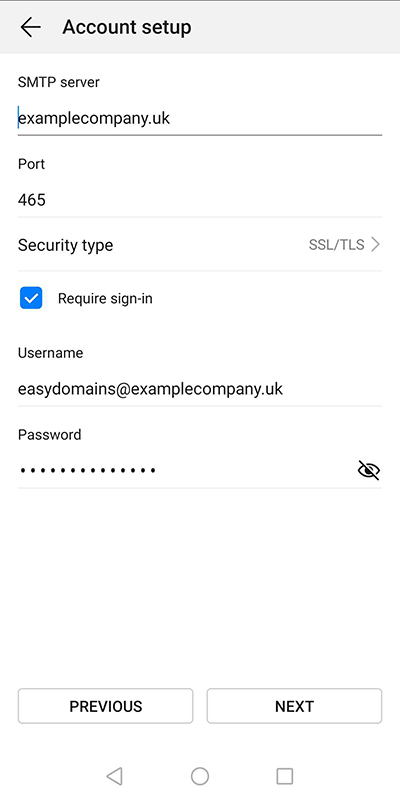
5. Hit "Next" to complete the setup.
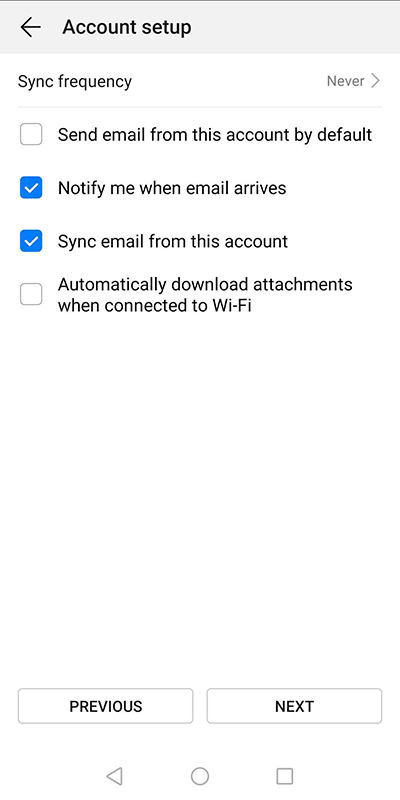
You are now ready to start sending and receiving emails from your Android device.
If you have any problems setting up your emails in the default Android mail app, please contact our team at support@easy-domains.co.uk or call us on 01253 968004.
Comments
0 comments
Please sign in to leave a comment.